---
license: apache-2.0
---
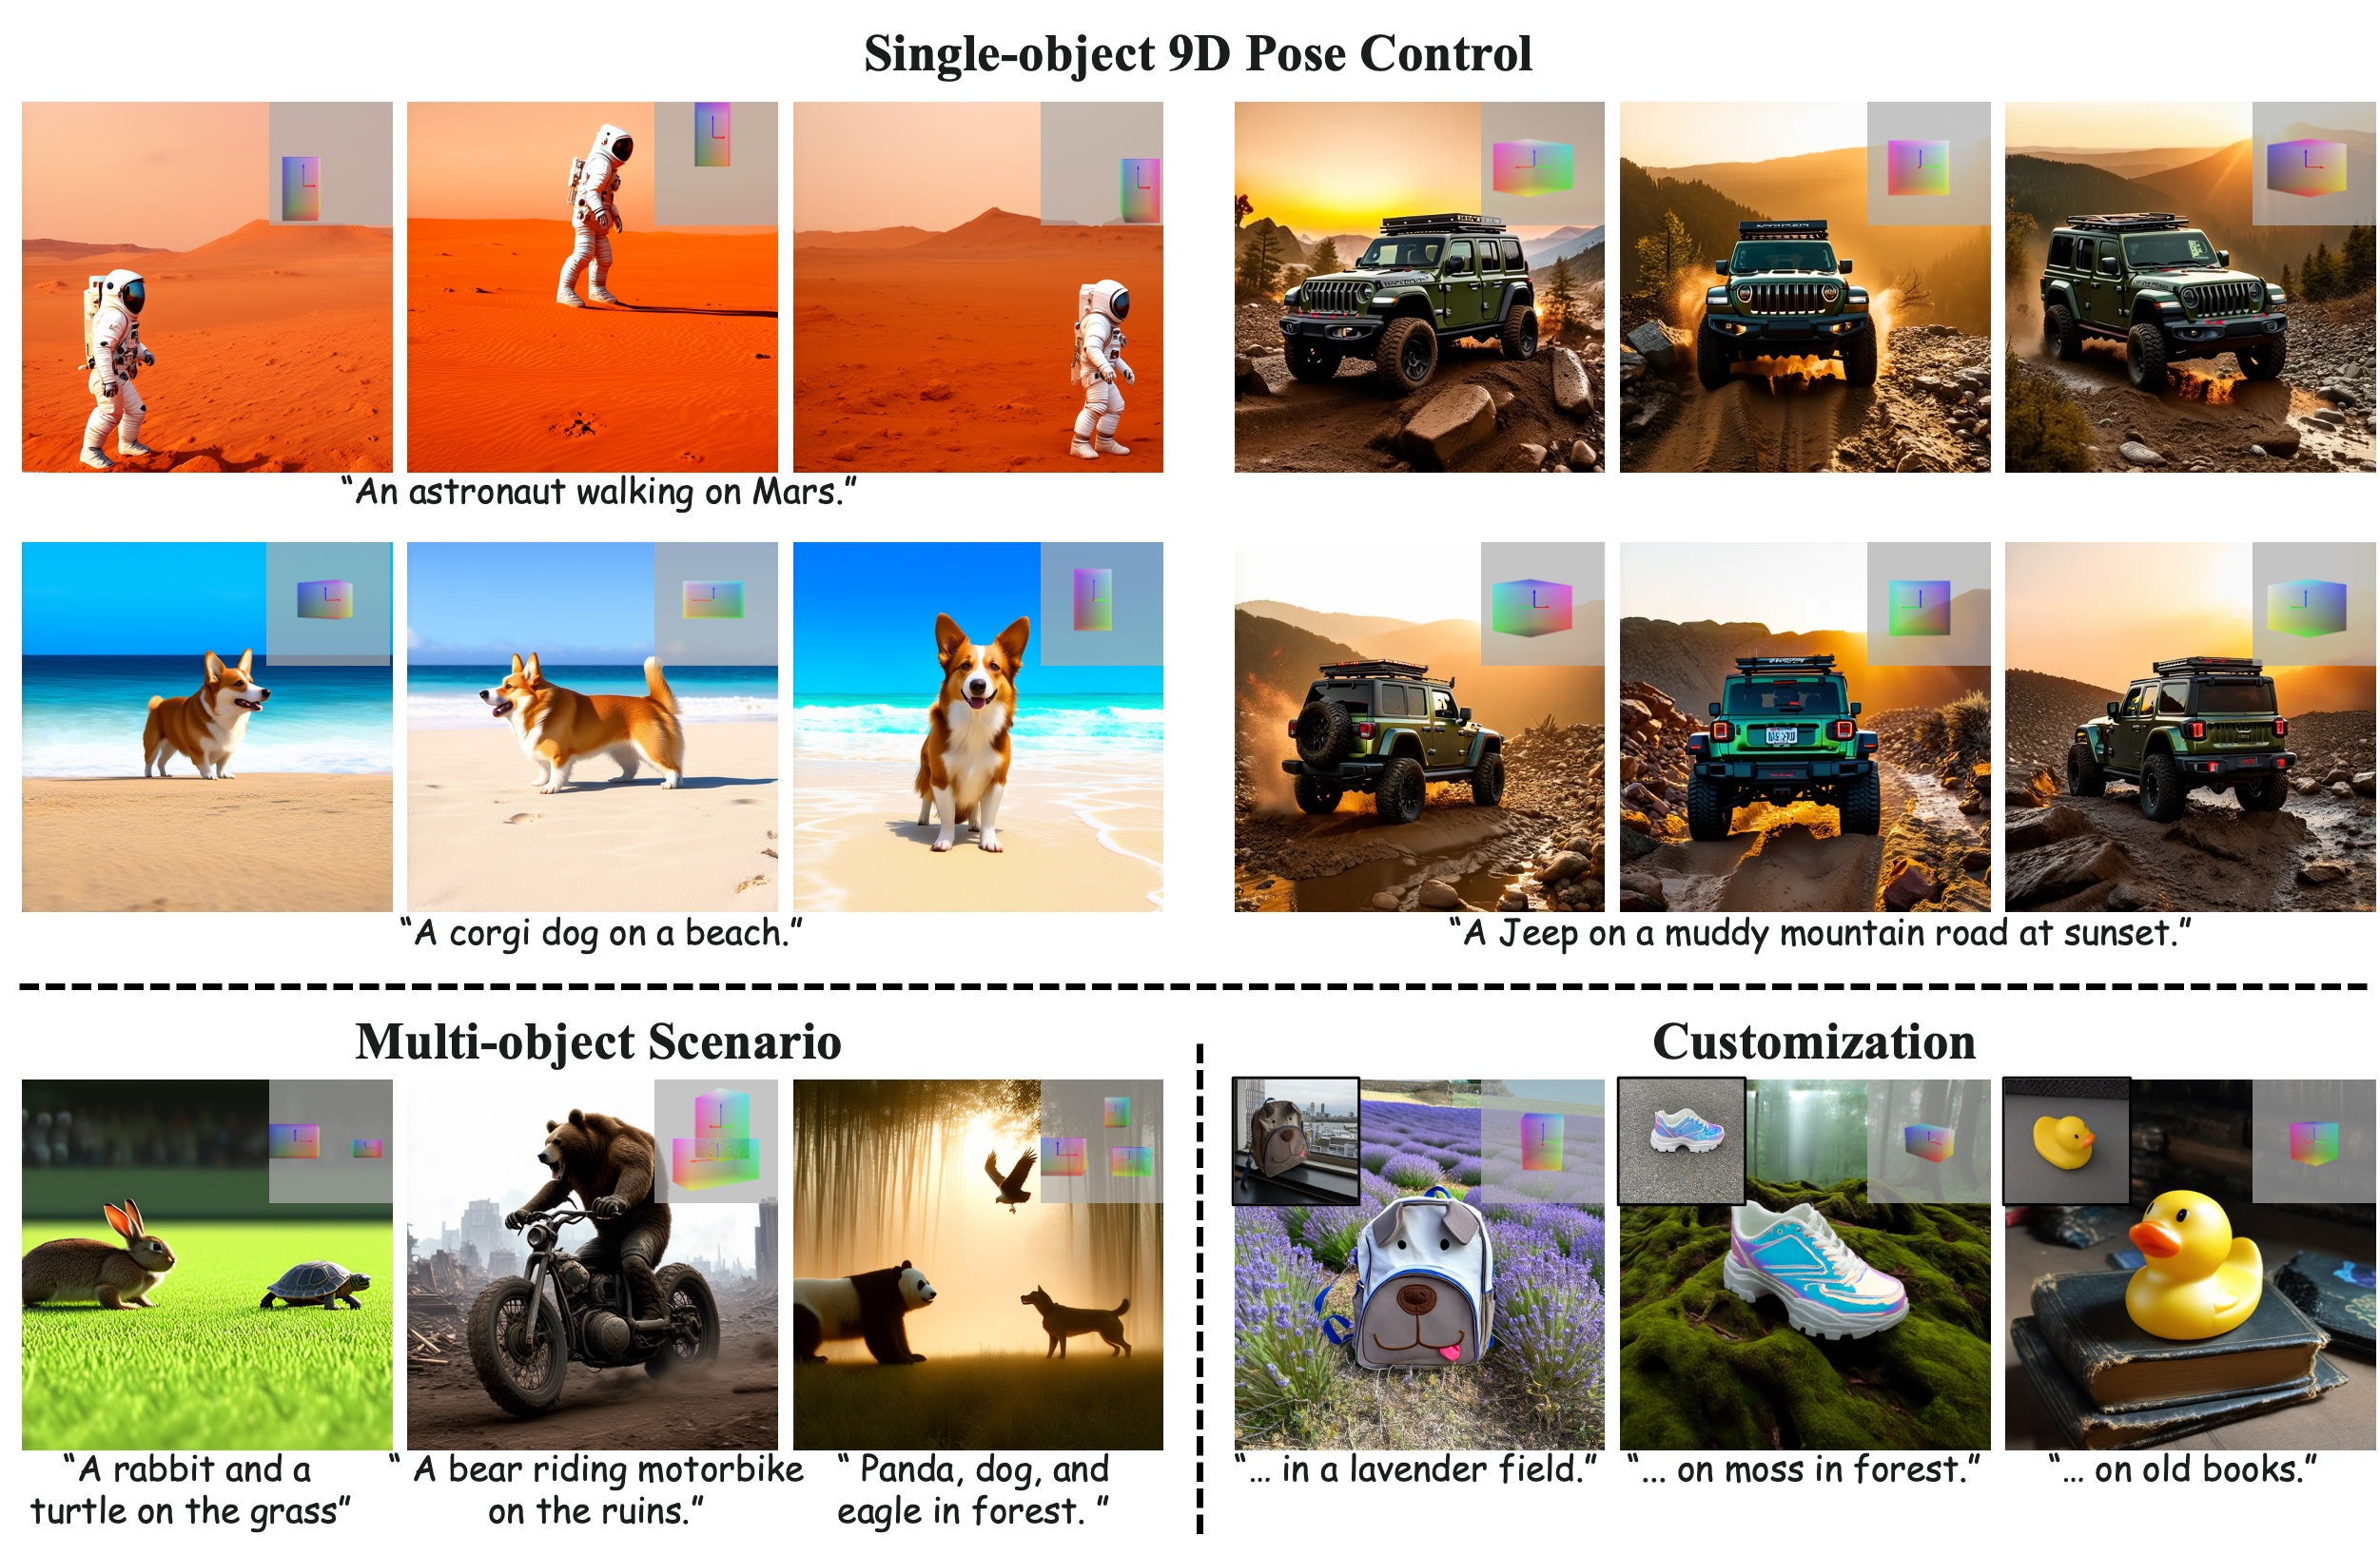
SceneDesigner: Controllable Multi-Object Image Generation with 9-DoF Pose Manipulation
Zhenyuan Qin*
·
Xincheng Shuai*
·
Henghui Ding †
Fudan University


## ⚙️ Quick Start
### 1. Installation
1. Install Python environment (recommended to use uv)
```bash
uv sync
```
Or alternatively:
```bash
pip install -r requirements.txt
```
2. Install Blender environment
```bash
cd render
python install.py
```
If the automatic installation script fails, you can install manually:
* First download [Blender](https://download.blender.org/release/Blender4.2/) and extract it to the `./render` directory
* Then locate the Blender Python path and install the Python dependencies for Blender, for example:
```bash
cd render
blender-4.2.8-linux-x64/4.2/python/bin/python3.11 -m pip install -r blender_requirements.txt
```
### 2. Download Checkpoints
1. Download the [SceneDesigner](https://huggingface.co/FudanCVL/SceneDesigner) weights to the `checkpoints` directory
2. Download the [Stable Diffusion 3.5](https://huggingface.co/stabilityai/stable-diffusion-3.5-medium) base model weights to the `checkpoints` directory
### 3. Run Demo
Launch the Gradio app:
```bash
python app.py \
--blender_path render/blender/blender \
--device cuda:0 \
--port 7861
```
- Adjust the 9D pose of the cube in the **Cube Controls** panel
- Enter text prompts in the **Generation Config** panel and click the **Generate Images** button to create images
## ✒️ Citation
If you find our work useful for your research and applications, please kindly cite using this BibTeX:
```latex
@inproceedings{SceneDesigner,
title={SceneDesigner: Controllable Multi-Object Image Generation with 9-DoF Pose Manipulation},
author={Qin, Zhenyuan and Shuai, Xincheng and Ding, Henghui},
booktitle={NeurIPS},
year={2025}
}
```