Transformers documentation
キーポイント検出
You are viewing main version, which requires installation from source. If you'd like
regular pip install, checkout the latest stable version (v5.22.2).
キーポイント検出
Keypoint detectionは、画像内の特定の注目点を特定し、その位置を特定します。これらのキーポイント(ランドマークとも呼ばれます)は、顔の特徴や物体の部位など、対象物の意味のある特徴を表します。これらのモデルは画像を入力として受け取り、以下の出力を返します。
- キーポイントとスコア: 注目ポイントとその信頼度スコア。
- ディスクリプタ: 各キーポイントの周囲の画像領域の表現であり、そのテクスチャ、勾配、方向などの特性を捉えます。
このガイドでは、画像からキーポイントを抽出する方法を示します。
このチュートリアルでは、キーポイント検出用の基盤モデルであるSuperPointを使用します。
from transformers import AutoImageProcessor, SuperPointForKeypointDetection
processor = AutoImageProcessor.from_pretrained("magic-leap-community/superpoint")
model = SuperPointForKeypointDetection.from_pretrained("magic-leap-community/superpoint")
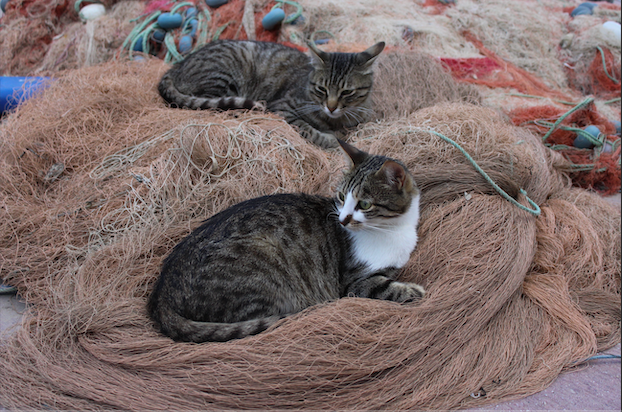
以下の画像でモデルをテストしてみましょう。

import torch
from PIL import Image
import requests
import cv2


url_image_1 = "https://huggingface.co/datasets/huggingface/documentation-images/resolve/main/bee.jpg"
image_1 = Image.open(requests.get(url_image_1, stream=True).raw)
url_image_2 = "https://huggingface.co/datasets/huggingface/documentation-images/resolve/main/cats.png"
image_2 = Image.open(requests.get(url_image_2, stream=True).raw)

images = [image_1, image_2]
これで入力処理と推論を実行できます。
inputs = processor(images,return_tensors="pt").to(model.device, model.dtype)
outputs = model(**inputs)
モデルの出力には、バッチ内の各アイテムについて、相対的なキーポイント、ディスクリプタ、マスク、スコアが含まれます。マスクは、キーポイントが存在する画像の領域をハイライトします。
SuperPointKeypointDescriptionOutput(loss=None, keypoints=tensor([[[0.0437, 0.0167],
         [0.0688, 0.0167],
         [0.0172, 0.0188],
         ...,
         [0.5984, 0.9812],
         [0.6953, 0.9812]]]),
         scores=tensor([[0.0056, 0.0053, 0.0079,  ..., 0.0125, 0.0539, 0.0377],
        [0.0206, 0.0058, 0.0065,  ..., 0.0000, 0.0000, 0.0000]],
       grad_fn=<CopySlices>), descriptors=tensor([[[-0.0807,  0.0114, -0.1210,  ..., -0.1122,  0.0899,  0.0357],
         [-0.0807,  0.0114, -0.1210,  ..., -0.1122,  0.0899,  0.0357],
         [-0.0807,  0.0114, -0.1210,  ..., -0.1122,  0.0899,  0.0357],
         ...],
       grad_fn=<CopySlices>), mask=tensor([[1, 1, 1,  ..., 1, 1, 1],
[1, 1, 1, ..., 0, 0, 0]], dtype=torch.int32), hidden_states=None)画像内の実際のキーポイントをプロットするには、出力の事後処理が必要です。そのためには、post_process_keypoint_detection に出力とともに実際の画像サイズを渡す必要があります。
image_sizes = [(image.size[1], image.size[0]) for image in images]
outputs = processor.post_process_keypoint_detection(outputs, image_sizes)
出力は、キーポイント、スコア、ディスクリプターからなる処理済み出力の辞書からなるリストになりました。
[{'keypoints': tensor([[ 226,   57],
          [ 356,   57],
          [  89,   64],
          ...,
          [3604, 3391]], dtype=torch.int32),
  'scores': tensor([0.0056, 0.0053, ...], grad_fn=<IndexBackward0>),
  'descriptors': tensor([[-0.0807,  0.0114, -0.1210,  ..., -0.1122,  0.0899,  0.0357],
          [-0.0807,  0.0114, -0.1210,  ..., -0.1122,  0.0899,  0.0357]],
         grad_fn=<IndexBackward0>)},
    {'keypoints': tensor([[ 46,   6],
          [ 78,   6],
          [422,   6],
          [206, 404]], dtype=torch.int32),
  'scores': tensor([0.0206, 0.0058, 0.0065, 0.0053, 0.0070, ...,grad_fn=<IndexBackward0>),
  'descriptors': tensor([[-0.0525,  0.0726,  0.0270,  ...,  0.0389, -0.0189, -0.0211],
          [-0.0525,  0.0726,  0.0270,  ...,  0.0389, -0.0189, -0.0211]}]
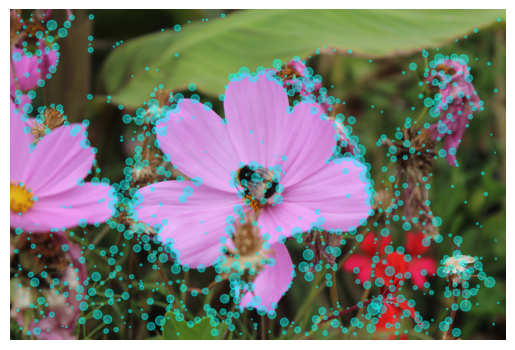
これらを使用して、キーポイントをプロットできます。
import matplotlib.pyplot as plt
import torch

for i in range(len(images)):
  keypoints = outputs[i]["keypoints"]
  scores = outputs[i]["scores"]
  descriptors = outputs[i]["descriptors"]
  keypoints = outputs[i]["keypoints"].detach().numpy()
  scores = outputs[i]["scores"].detach().numpy()
  image = images[i]
  image_width, image_height = image.size

  plt.axis('off')
  plt.imshow(image)
  plt.scatter(
      keypoints[:, 0],
      keypoints[:, 1],
      s=scores * 100,
      c='cyan',
      alpha=0.4
  )
  plt.show()
以下に出力が表示されています。